Ah, school lunch pizza. Just the thought of those rectangular slices brings back a flood of nostalgic memories for many of us. Whether it was the gooey cheese, the crispy edges, or the sheer joy of pizza day, there’s something uniquely special about school lunch pizza. This article will dive deep into the world of school lunch pizza, from its history and preparation to serving and storing tips. We’ll explore traditional and creative toppings, common mistakes to avoid, and much more. So, let’s embark on this delicious journey to recreate and enjoy the beloved school cafeteria pizza right at home.
Introduction and History
Introduction to School Lunch Pizza
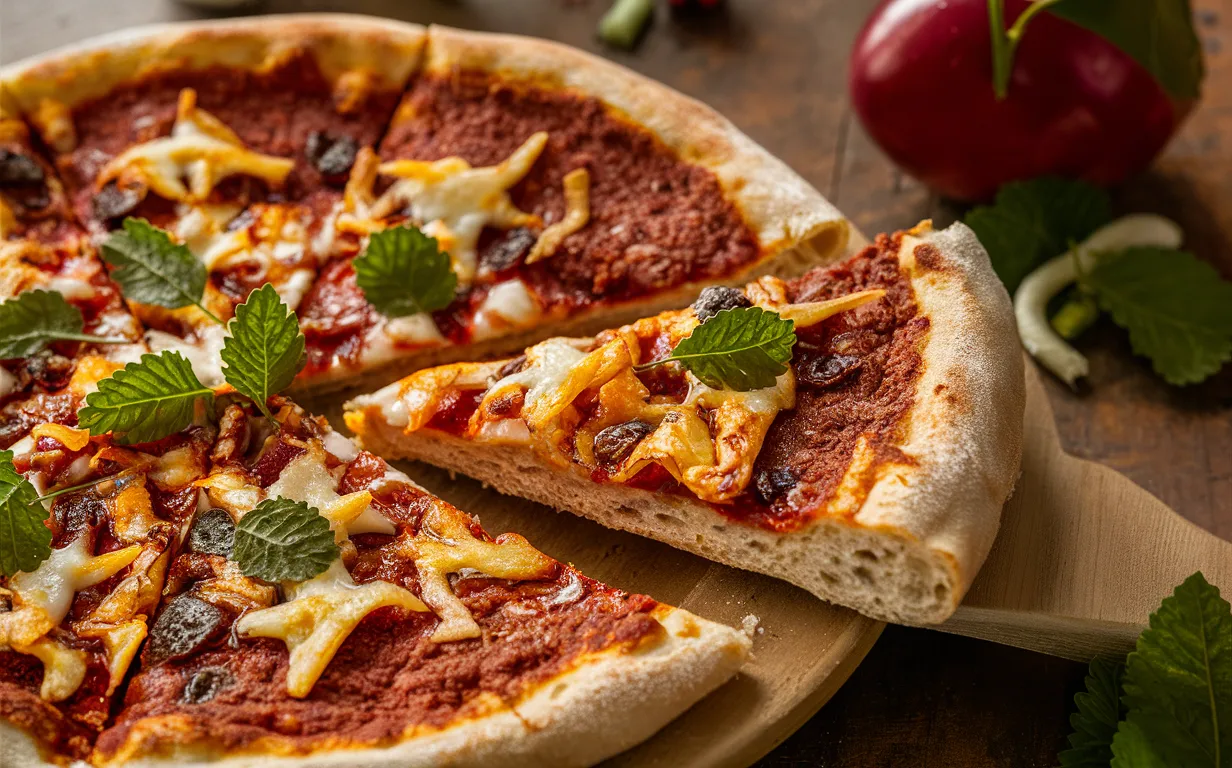
School lunch pizza is more than just a meal; it’s a slice of nostalgia that brings back memories of simpler times. These pizzas, often rectangular and served in school cafeterias, were a staple for many growing up. The allure lies in their simplicity and the joy they brought to school lunches.
Historical Background
The origins of school cafeteria pizza can be traced back to the 1970s when the National School Lunch Program sought to introduce more appealing and nutritious meals. Pizza quickly became a favorite due to its universal appeal and versatility. Over the decades, the recipe evolved, incorporating different ingredients and techniques to cater to varying tastes and nutritional guidelines.
Initially, these pizzas were simple – a basic dough topped with tomato sauce and cheese. However, as schools aimed to make lunches more nutritious, whole wheat crusts, low-fat cheese, and vegetable toppings became common. The evolution of school lunch pizza reflects broader trends in American eating habits and the push for healthier school meals.
Interestingly, the rectangular shape of these pizzas wasn’t just for nostalgia; it was a practical decision. The shape made it easier to cut into equal portions, ensuring every student got a fair share. Plus, it fit perfectly into the lunch trays used in schools.
As we delve deeper into the world of school lunch pizza, we’ll explore not just its history but also how to recreate these beloved slices at home. From making the dough to choosing the right toppings, this guide will help you bring a piece of school nostalgia into your kitchen.
Ingredients and Preparation
Basic Ingredients
Creating the perfect school lunch pizza starts with selecting the right ingredients. The beauty of this pizza lies in its simplicity and the use of readily available items. Typically, the ingredients include:
- Dough: You can use either homemade or store-bought dough. Homemade dough gives you control over the texture and flavor, while store-bought dough offers convenience.
- Sauce: A basic tomato sauce is essential. You can opt for store-bought pizza sauce or make your own using crushed tomatoes, garlic, basil, and oregano.
- Cheese: Mozzarella is the traditional choice, but a blend of cheddar and mozzarella can add a richer flavor. For a nostalgic touch, consider using a blend reminiscent of the government cheese used in schools.
- Toppings: Common toppings include pepperoni, sausage, and vegetables like onions and bell peppers. Feel at liberty to explore various toppings according to your preferences.
Preparing the Dough
The foundation of any good school cafeteria pizza is the dough. Here’s a step-by-step guide to making a homemade pizza dough that will transport you back to your school days:
- Ingredients:
- 3 ½ cups all-purpose flour
- 1 cup instant dry milk
- 2 ¼ cups warm water
- 2 tablespoons oil
- 1 ½ teaspoons salt
- 3 tablespoons sugar
- 1 packet (2 ¼ teaspoons) active dry yeast
- Instructions:
- Mix Dry Ingredients: In a large mixing bowl, combine the flour, dry milk, salt, and sugar.
- Activate Yeast: In a separate bowl, combine warm water and yeast. Allow it to rest for approximately 5 minutes until it develops a frothy texture.
- Combine and Knead: Pour the yeast mixture into the dry ingredients and add the oil. Mix until the dough starts to come together, then knead it for about 5-7 minutes until it’s smooth and elastic.
- Let It Rise: Place the dough in a lightly oiled bowl, cover it with a damp cloth, and let it rise in a warm place for about 1 hour or until it doubles in size.
For those pressed for time, store-bought dough works just as well. Just ensure it’s at room temperature before you start working with it, making it easier to stretch and shape.
Pizza Sauce Preparation
A good sauce can elevate your sheet pan pizza from ordinary to extraordinary. Here’s a simple recipe for a flavorful pizza sauce:
- Ingredients:
- 1 can (15 ounces) of crushed tomatoes
- 2 cloves garlic, minced
- 1 teaspoon dried basil
- 1 teaspoon dried oregano
- Salt and pepper to taste
- 1 tablespoon olive oil
- Instructions:
- Sauté Garlic: In a saucepan, heat the olive oil over medium heat. Incorporate the minced garlic and cook until it releases its aroma, typically around 1 minute.
- Add Tomatoes and Herbs: Pour in the crushed tomatoes and add the basil, oregano, salt, and pepper. Stir to combine.
- Lower the heat and allow the sauce to simmer gently for approximately 15 to 20 minutes, enabling the flavors to blend harmoniously.
Feel free to customize the sauce to your liking by adding a pinch of sugar for sweetness or a splash of balsamic vinegar for depth.
With these basic ingredients and preparation steps, you’re well on your way to making a delicious and nostalgic school lunch pizza. In the next part, we’ll delve into the various cooking methods and tips to ensure your pizza turns out perfectly every time.
Cooking Methods and Tips
Baking the Pizza
Perfecting the art of baking school lunch pizza involves a few key steps to ensure a crispy crust and a well-cooked top. Here’s a detailed guide:
- Preheat the Oven: Start by preheating your oven to 475°F (245°C). A high temperature is crucial for achieving that perfect crispy crust.
- Prepare the Pan: Line a half-sheet pan (about 18 x 13 inches) with parchment paper or lightly oil it. This prevents the dough from sticking and makes cleanup easier.
- Stretch the Dough: After the dough has risen, transfer it to the prepared pan. Using your fingers, gently stretch and press the dough to fit the entire pan. If it resists stretching, let it rest for a few minutes before trying again.
- Par-Bake the Crust: Par-baking ensures the crust is fully cooked and prevents it from becoming soggy. Bake the stretched dough in the preheated oven for about 10 minutes, or until it begins to set but hasn’t browned.
- Add the Sauce and Toppings: Remove the par-baked crust from the oven and spread your prepared pizza sauce evenly over it, reaching all the way to the edges. Sprinkle the cheese and add your chosen toppings.
- Final Bake: Return the pizza to the oven and bake for an additional 12-15 minutes, or until the cheese is melted and bubbly and the crust is golden brown.
Tips for a Crispy Crust
Achieving a crispy crust can be a bit tricky, but these tips should help:
- Use High Heat: As mentioned, baking at a high temperature (475°F) is essential.
- Par-Bake the Crust: This step helps set the crust, ensuring it cooks through and stays crispy.
- Use a Pizza Stone: If you have a pizza stone, place it in the oven during preheating. Baking your pizza on a preheated stone can help achieve a crispy bottom.
- Avoid Overloading with Toppings: Too many toppings can make the pizza soggy.Consider the quantity of sauce and toppings you apply.
Common Mistakes to Avoid
Even seasoned cooks can make mistakes. Here are a few common pitfalls and how to avoid them:
- Overcooking the Crust: Keep an eye on your pizza as it bakes. If it looks like it’s browning too quickly, reduce the oven temperature slightly.
- Uneven Cheese Distribution: Ensure the cheese is spread evenly to avoid some areas being overly cheesy while others are sparse.
- Not Preheating the Oven: A fully preheated oven is crucial for proper baking. Make sure your oven reaches the desired temperature before you start baking.
By following these methods and tips, you’ll be well on your way to mastering the art of school cafeteria pizza. In the next part, we’ll explore the exciting world of toppings, both traditional and creative, to make your pizza truly unique and delicious.
Toppings and Variations
Traditional Toppings
When it comes to school lunch pizza, traditional toppings hold a special place. These classic choices are what most of us remember from our school days. Here are some of the most beloved traditional toppings:
Cheese Options
- Mozzarella: The most common choice, providing that stretchy, melty goodness we all love.
- Cheddar: Often used in combination with mozzarella to add a richer flavor.
- Government Cheese: For the most authentic nostalgia, try a blend similar to the government cheese used in schools.
Meat Toppings
- Pepperoni: A classic favorite that adds a spicy kick.
- Sausage: Ground sausage, either plain or Italian, offers a savory addition.
- Ground Beef: A milder meat topping that pairs well with various sauces.
Vegetarian Options
- Onions: Adds a bit of crunch and sweetness.
- Bell Peppers: For color and a slight tang.
- Mushrooms: Earthy and meaty, mushrooms are a great vegetarian topping.
Creative Toppings
While traditional toppings are always a hit, exploring creative options can make your sheet pan pizza stand out. Here are some inventive ideas:
Unconventional Toppings
- Pineapple: Yes, it’s controversial, but the sweet and savory combination can be delightful.
- Spinach and Feta: A healthier option that adds a gourmet touch.
- BBQ Chicken: Swap the traditional tomato sauce for BBQ sauce and top with chicken, red onions, and cilantro.
Combining Different Flavors
- Buffalo Chicken: Use buffalo sauce instead of tomato sauce, and top with shredded chicken, blue cheese, and a drizzle of ranch.
- Taco Pizza: Top with seasoned ground beef, cheddar cheese, lettuce, tomatoes, and a dollop of sour cream after baking.
- Breakfast Pizza: Spread a thin layer of cream cheese, add scrambled eggs, bacon, and cheddar cheese for a morning twist.
Healthy Topping Alternatives
- Whole Wheat Crust: For added nutrition and fiber.
- Low-Fat Cheese: Reduces the overall fat content without compromising on flavor.
- Vegetable Medley: Load up on various veggies like zucchini, cherry tomatoes, and arugula.
External Link Integration
To explore more healthy pizza toppings, check out this comprehensive guide on healthy pizza toppings.
Tips for Adding Toppings
- Balance: Ensure a good balance between the sauce, cheese, and toppings to avoid soggy or overloaded pizza.
- Layering: Start with sauce, followed by cheese, and then add your toppings. This method helps in even cooking and prevents toppings from burning.
- Even Distribution: Spread your toppings evenly to ensure every bite is flavorful and delicious.
By experimenting with both traditional and creative toppings, you can tailor your school lunch pizza to your preferences and make it a hit at any meal. In the next part, we’ll look at how to serve and store your pizza to maintain its deliciousness.
FAQs and Conclusion
Frequently Asked Questions
What goes with pizza for school lunch?
When serving school lunch pizza, it’s great to pair it with sides that complement its flavors and add nutritional value. Consider options like:
- Salad: A fresh garden salad with a light vinaigrette or a Caesar salad can balance the richness of the pizza.
- Fruit: Fresh fruit such as apple slices, grapes, or orange segments add a refreshing touch.
- Vegetables: Carrot sticks, cucumber slices, or cherry tomatoes make for healthy and crunchy sides.
- Dairy: A small serving of yogurt or a cheese stick can round out the meal with extra protein and calcium. For more ideas on nutritious lunch options, visit Lasaga Recipes.
What are some methods for keeping pizza warm for a school lunch?
Keeping pizza warm until lunchtime can be a bit tricky, but these methods can help:
- Thermal Lunch Box: Use an insulated lunch box designed to keep food warm.
- Foil Wrap: Wrap the pizza slices in aluminum foil to retain heat.
- Thermos: Place the pizza in a wide-mouth thermos after heating it up. This method works well to keep it warm for a few hours.
- Preheat the Container: If using a thermos or insulated lunch box, preheat it by filling it with hot water for a few minutes before adding the pizza.
How do you pack pizza for school?
Packing pizza for school requires a bit of preparation to ensure it stays fresh and tasty:
- Cool It Down: Allow the pizza to cool slightly before packing it to prevent sogginess.
- Use Wax Paper: Place a sheet of wax paper between slices to keep them from sticking together.
- Sturdy Container: Use a sturdy, airtight container to prevent the pizza from getting squished.
- Napkins: Include a few napkins or paper towels to help with any grease.
Is school pizza healthier?
The healthiness of school cafeteria pizza can vary widely depending on the ingredients and preparation methods used:
- Whole Wheat Crust: Many schools have switched to whole wheat crusts to increase fiber content.
- Reduced-Fat Cheese: Using reduced-fat cheese can lower the overall fat content.
- Vegetable Toppings: Adding vegetables as toppings increases the nutritional value.
- Portion Control: School pizzas are typically portion-controlled, which can help manage calorie intake.
For a deeper dive into making healthier pizza choices, check out this guide on healthy pizza toppings.
Conclusion
In this comprehensive guide, we’ve explored the nostalgic world of school lunch pizza, from its history and traditional ingredients to creative toppings and practical tips for baking, serving, and storing. Whether you’re looking to recreate your childhood favorite or introduce this classic to a new generation, following these steps will ensure you make delicious, memorable school cafeteria pizza every time. Happy cooking and enjoy your trip down memory lane!