As the leaves change and the air crisps, nothing beats warm pumpkin bread. This article explores gluten-free pumpkin bread, bringing fall flavors without gluten worries. Whether you’re a pro or a novice, our guide helps you bake delicious gluten-free pumpkin bread. With essential ingredients, pro tips, and FAQs, we’ve got you covered for baking the perfect loaf
Introduction to Gluten-Free Pumpkin Bread
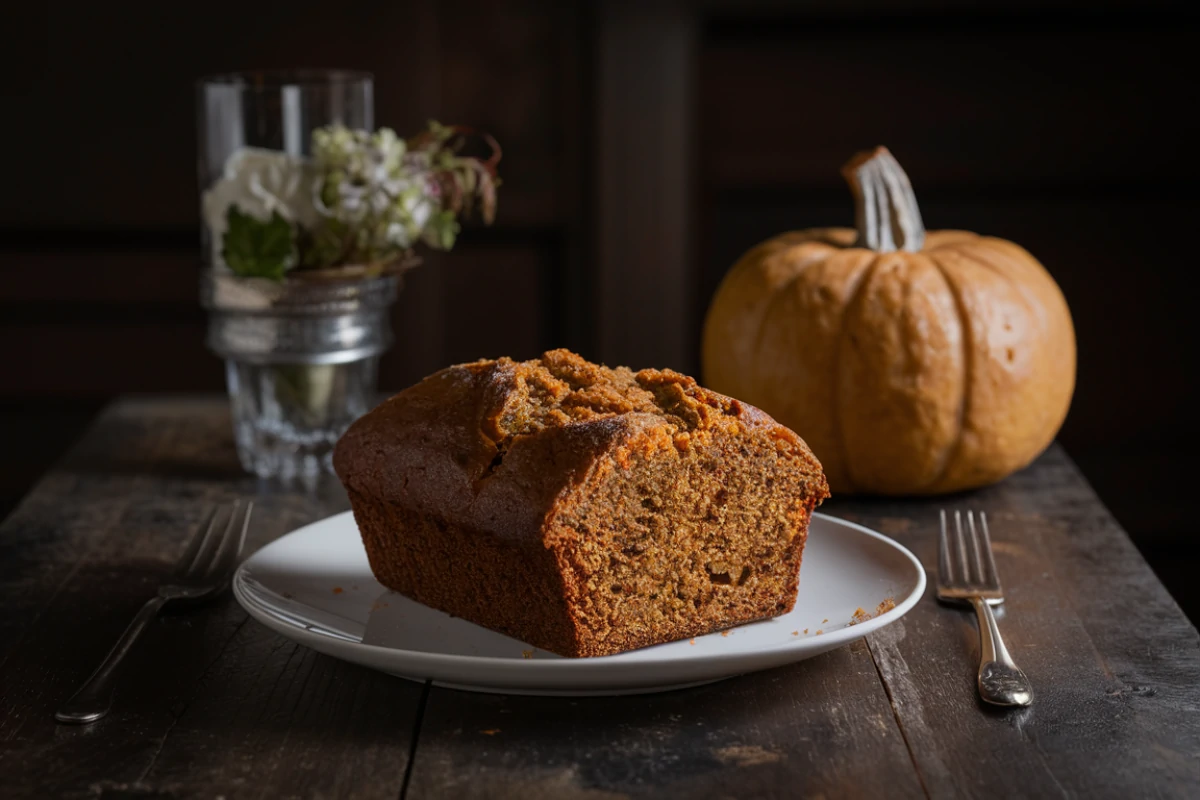
Welcome to the cozy, delicious realm of gluten-free pumpkin bread! This hearty treat is perfect for anyone looking to enjoy the flavors of autumn without gluten. Whether you’re avoiding gluten for health reasons or dietary preferences, this bread is a splendid addition to your baking repertoire.
Overview
Gluten-free pumpkin bread is more than just a seasonal delight; it’s a testament to how versatile gluten-free baking can be. Made with a mix of gluten-free flours and spiced with the quintessential flavors of pumpkin spice, this bread is moist, flavorful, and perfect for pairing with your morning coffee or as a comforting snack.
Objective
In this guide, we aim to equip you with everything you need to know to bake a delicious loaf of gluten-free pumpkin bread. From the key ingredients and easy-to-follow steps to tips for customization and storage, we’ve got all bases covered. So, let’s get baking and fill your kitchen with the scent of spiced pumpkin!
In our next section, we’ll explore the essential ingredients and some clever substitutions to make sure everyone can enjoy this fall treat, regardless of their dietary needs. And remember, for more tips on gluten-free baking, check out the Celiac Disease Foundation.
Ingredients and Substitutions for Gluten-Free Pumpkin Bread
Diving into the world of gluten-free baking doesn’t have to be daunting. With the right ingredients and a few smart swaps, you can whip up a delicious loaf of gluten-free pumpkin bread that everyone will love.
Basic Ingredients
To start, you’ll need some key ingredients that form the base of any good pumpkin bread:
- Gluten-Free All-Purpose Flour: This is the cornerstone of your bread, providing structure without the gluten. Seek out blends containing xanthan gum as it aids in replicating the texture of gluten.
- Pumpkin Puree: Ensure it’s 100% pumpkin for the best flavor and texture, not pumpkin pie filling which is pre-spiced and sweetened.
- Sugar: A blend of brown and white sugars adds depth and moisture.
- Spices: Classic pumpkin pie spice, cinnamon, nutmeg, and cloves bring those warm, spicy flavors we associate with fall.
- Baking Essentials: Eggs, baking soda, and baking powder are non-negotiables for the structure and rise of your bread.
Substitutions
Here’s where you can get creative and cater to various dietary needs without compromising on taste or texture:
- Flour Substitutes: If you don’t have a pre-mixed gluten-free flour, you can make your own blend with rice flour, tapioca starch, and potato starch.
- Egg-Free Options: For those avoiding eggs, chia or flax eggs are wonderful alternatives that keep the bread moist and binding.
- Dairy-Free Modifications: Use almond milk or coconut milk instead of regular milk, and opt for coconut oil or another vegetable oil in place of butter.
- Sugar Alternatives: To reduce the sugar content, you can use coconut sugar or a sugar-free substitute like erythritol that measures like sugar.
Remember, making substitutions may slightly alter the texture or flavor of your bread, so it’s worth experimenting a bit to find what works best for you. And for those looking into further allergy-friendly substitutes, the Food Allergy Research & Education website is a fantastic resource.
Next, we’ll move on to putting these ingredients together and baking your perfect loaf of gluten-free pumpkin bread. Stay tuned for detailed instructions in our next section!
Step-by-Step Baking Instructions for Gluten-Free Pumpkin Bread
Now that we have all our ingredients ready, let’s dive into the process of making your gluten-free pumpkin bread. Follow these steps closely to ensure your bread comes out perfectly moist and flavorful every time.
Preparation Steps
- Preheat Your Oven: Start by heating your oven to 350°F (175°C). This ensures a warm environment that activates the leavening agents for a good rise.
- Prepare the Pan: Line a 9×5 inch loaf pan with parchment paper and lightly grease it with oil or a non-stick spray to prevent sticking.
- Mix Dry Ingredients: In a large bowl, whisk together your gluten-free flour, baking powder, baking soda, salt, and spices. This uniform mixture helps distribute the flavors and leavening agents evenly.
- Combine Wet Ingredients: In a separate bowl, mix the pumpkin puree, eggs (or egg substitute), oil, and sugars until smooth. This integration of wet and dry components is crucial for the texture.
Combining and Baking
- Combine the Mixtures: Gradually add the dry ingredients to the wet mixture, stirring until just combined to avoid overworking the batter, which can make the bread tough.
- Pour into Pan: Transfer the batter to the prepared loaf pan and smooth the top with a spatula.
- Bake: Place the pan in the oven and bake for about 50-60 minutes. To ensure your gluten-free pumpkin bread is fully baked, use the toothpick test: if the toothpick comes out without any wet batter sticking to it, your bread is ready to be taken out of the oven.
- Cooling: Let the bread cool in the pan for about 10 minutes before transferring it to a wire rack to cool completely. This step is vital for the structure to set properly.
Visual Cues for Doneness
- Golden Brown Top: The top should be a lovely golden brown, and the edges should start to pull away from the pan.
- Springy Texture: When lightly pressed, the bread should spring back, indicating it’s baked through.
Following these steps will help you achieve a delicious loaf of gluten-free pumpkin bread that’s perfect for any fall gathering or cozy afternoon tea. In our next section, we’ll cover the nutritional benefits of incorporating pumpkin into your diet and why this bread is a healthier option. Stay tuned for more insightful tips!
Nutritional Information of Gluten-Free Pumpkin Bread
Understanding the nutritional benefits of the foods we eat can make baking even more rewarding. Gluten-free pumpkin bread not only satisfies your sweet tooth but also packs a healthy punch, thanks to its star ingredient: pumpkin.
Health Benefits of Pumpkin
Pumpkin is a low-calorie vegetable rich in vitamins, minerals, and antioxidants. Here’s how it benefits your health:
- High in Vitamin A: Pumpkin is loaded with beta-carotene, which is converted into vitamin A in the body. This vitamin is crucial for eye health and immune function.
- Rich in Fiber: Pumpkin adds a good amount of dietary fiber to your bread, aiding in digestion and helping you feel full longer.
- Antioxidant Properties: It contains antioxidants like alpha-carotene, beta-carotene, and beta-cryptoxanthin. These help neutralize free radicals, potentially reducing your risk of chronic diseases.
Calorie Content
A typical slice of gluten-free pumpkin bread contains approximately 200-250 calories, depending on the ingredients used. By controlling the sugar and oil in the recipe, you can manage the calorie count, making it a healthier option compared to many store-bought alternatives.
Making Your Bread More Nutritious
To boost the nutritional profile of your gluten-free pumpkin bread, consider incorporating these tips:
- Use Healthier Fats: Opt for heart-healthy oils like olive oil or avocado oil instead of vegetable oil.
- Add Nuts and Seeds: Include nuts like walnuts or almonds and seeds such as flaxseeds or pumpkin seeds to add healthy fats, proteins, and additional fiber.
- Reduce Sugar: Experiment with reducing the sugar content or using natural sweeteners like honey or maple syrup, which offer more nutrients than refined sugar.
By understanding the nutritional aspects and making conscious choices in your ingredients, your homemade gluten-free pumpkin bread can be both a treat and a healthy component of your diet. Up next, we’ll explore how you can customize your pumpkin bread. You can do this with a variety of mix-ins and toppings to suit your taste preferences. This will make your bread uniquely yours. Stay tuned for more delicious ideas!
Customizing Your Gluten-Free Pumpkin Bread
One of the joys of baking your own gluten-free pumpkin bread is the ability to customize it to your liking. Whether you’re a fan of extra spice, sweet surprises, or crunchy additions, there are plenty of ways to make your pumpkin bread uniquely delicious.
Mix-Ins and Toppings
Adding mix-ins and toppings to your pumpkin bread can transform it from good to great with just a few simple tweaks:
- Chocolate Chips: Stir in dark, milk, or white chocolate chips for a sweet, melty contrast to the spiced bread.
- Nuts: Walnuts, pecans, or almonds can be mixed into the batter or sprinkled on top for a crunchy texture and rich flavor.
- Dried Fruit: Consider adding raisins, dried cranberries, or chopped dates for a burst of sweetness and a chewy texture.
- Streusel Topping: A crumbly streusel topping made with brown sugar, butter, and cinnamon can add a delightful crunch and sweetness to the top of your bread.
Flavor Variations
Experimenting with different flavors can also add a new twist to your classic pumpkin bread recipe:
- Orange Zest: Add the zest of an orange to the batter. It infuses the bread with a bright, citrusy flavor, complementing the pumpkin spice.
- Espresso Powder: Add a teaspoon of espresso powder. It deepens the overall flavors of the bread, enhancing the pumpkin and spice notes.
- Vanilla Bean: Incorporate the seeds from a vanilla bean or a splash of pure vanilla extract. This adds a subtle, aromatic sweetness, elevating the simple flavors.
These customizations not only enhance the taste and texture of your gluten-free pumpkin bread but also allow you to tailor the recipe to suit your dietary preferences and taste buds. Up next, we’ll cover the best practices for storing and freezing your pumpkin bread to ensure it remains just as delicious as the day it was baked. Stay tuned for practical tips to keep your bread fresh and tasty!
Storing and Freezing Tips for Gluten-Free Pumpkin Bread
Proper storage is key to maintaining the freshness and flavor of your gluten-free pumpkin bread. Whether you want to keep it on hand for quick breakfasts or save some for a special occasion, here’s how to store and freeze your bread effectively.
Short-Term Storage
For short-term storage, keep these tips in mind:
- Cool Completely: Allow your pumpkin bread to cool completely before storing. This prevents moisture buildup inside the container, which could result in the bread becoming soggy.
- Airtight Container: Store your bread in an airtight container or wrap it tightly in plastic wrap.
By sealing your gluten-free pumpkin bread in an airtight container, you help lock in the moisture, which prevents the bread from becoming dry. - Room Temperature: Keep the bread at room temperature for up to three days. If you’ve added fresh fruit or other perishable items as mix-ins, you may want to refrigerate it to extend its freshness.
Freezing and Reheating
To freeze your pumpkin bread:
- Wrap Well: Wrap the bread tightly in plastic wrap, then again in aluminum foil or place it in a freezer-safe bag.
Wrapping your gluten-free pumpkin bread in both plastic wrap and aluminum foil before freezing it ensures that the bread is shielded against freezer burn, keeping it fresher for longer. - Label and Freeze: Label the package with the date, and you can freeze the bread for up to three months.
- Thawing: When ready to enjoy, thaw the bread at room temperature or overnight in the refrigerator.
- Reheating: To restore the just-baked taste and texture, gently warm slices in the oven or toaster.
Following these storage guidelines will help ensure that your gluten-free pumpkin bread remains delicious for days or even months, giving you the flexibility to enjoy it whenever the craving strikes. In the next section, we’ll tackle some common challenges you might face while baking gluten-free bread and provide solutions to ensure your baking success. Stay tuned for helpful troubleshooting tips!
Tips and Solutions for Baking Gluten-Free Pumpkin Bread
When diving into the world of gluten-free baking, especially with treats like gluten-free pumpkin bread, you may encounter a few common challenges. Here, we address some frequently asked questions to help ensure your baking success.
What is the trick to making good gluten-free bread?
The key to excellent gluten-free bread lies in the balance of ingredients and the right techniques:
- Proper Flour Mix: Choose a high-quality, all-purpose gluten-free flour blend with xanthan gum or guar gum for better results.
- Hydration: Adjust the liquid content in the recipe to prevent dryness in the bread, as gluten-free flours absorb more moisture.
- Mixing Technique: Thoroughly mix the batter to activate the gums and evenly distribute ingredients, promoting the bread’s structure and rise
Does gluten-free bread need to proof twice?
Unlike traditional wheat bread, most gluten-free bread recipes do not require a second proofing. Gluten-free doughs generally only need one proofing period since they lack gluten, which benefits from the additional rise times to develop strands and texture. Single proofing is usually sufficient to achieve the desired texture.
How do you keep gluten-free bread from crumbling?
To prevent your gluten-free bread from crumbling:
- Add Binders: Xanthan gum or psyllium husk powder are excellent binders that help mimic gluten’s structural properties.
- Eggs and Fats: Incorporating eggs and healthy fats into your recipe can improve the bread’s moisture content and cohesion, reducing crumbliness.
- Avoid Over-Baking: Keeping an eye on your baking time and temperature prevents the bread from becoming too dry, which can lead to a crumbly texture.
Why does gluten-free bread dry out?
Gluten-free bread tends to dry out faster than its gluten-containing counterparts due to:
- Absence of Gluten: Gluten helps retain moisture, so without it, breads can become dry quickly.
- Starches and Flours Used: Many gluten-free flours are higher in starch, which can lead to a drier texture as the bread cools and ages.
- Storage: Proper storage in airtight containers can help mitigate dryness. Avoid refrigerating as it can accelerate drying out; instead, freeze any bread that you won’t consume within a day or two.
Understanding these aspects and how to manage them can enhance your gluten-free baking, ensuring that your pumpkin bread is just as delightful as any traditional recipe.
Discover a wide array of recipes that will spark your love for cooking and fulfill your culinary desires. Our platform caters to individuals of all culinary skill levels, whether you’re an experienced chef or just starting out in the kitchen. Whether you’re in search of simple weekday dishes or extravagant weekend spreads, we have something for everyone. Rekindle your passion for cooking by joining us!